
GEL NAIL WRAPS HOW TO...
Nail prep
-

Wash
Wash your hands with soap. Remove any oil.
-

Cuticles
Make sure your cuticles are pushed back.
-
Buff
Smooth nails by using nail file or buffer.
-

Wipe
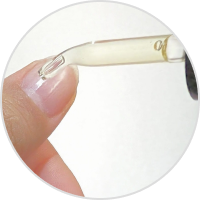
Wipe nails with prep & wipe to remove oils.
-

Dry
Your nails need to be dry before application.


How to apply
-
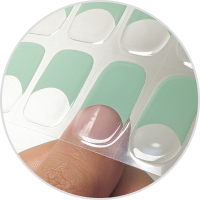
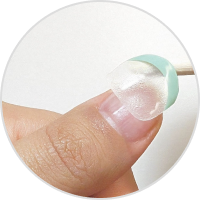
Select
Select the gel wrap that best fits the nail size. Remove protective sticker on top.
-
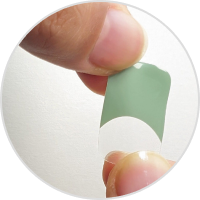
Stretch
If required you can gently stretch the edge of the wrap to get the perfect fit.
-
Place
Place the gel wrap on your nail gently without touching your cuticles or skin.
-
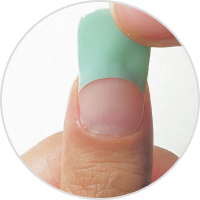
Stick
The wrap can be applied like a sticker. Press down onto the nail firmly.
-
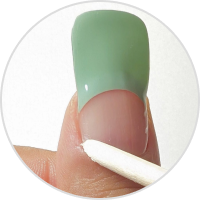
Smooth
Smooth out any wrinkles or air bubbles. Use the wooden stick to flatten the edges.
-
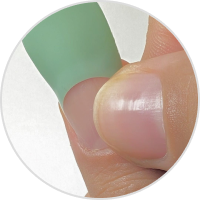
Trim
Trim any excess with nail scissors. File the edge gently in one direction under your nail for a smooth edge.
-
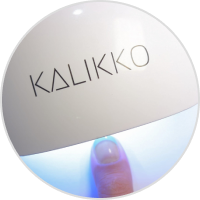
Cure
Cure your nails with your UV\LED lamp for 60 seconds. Repeat if necessary to completely harden.
-
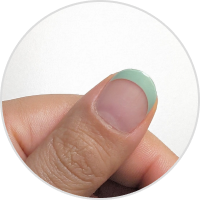
Done
File again for a smoother finish. Apply top coat for extra strength and shine.


How to remove
-

Lift
Using the wooden stick gently lift the wrap from the edges and apply cuticle oil between the nail bed and the wrap.
-
Remove
Soak the wooden stick in cuticle oil and slide it under the wrap in a back and forth motion. Avoid sudden lifting to prevent nail damage.
-

Clean
Clean your nail down with prep & wipe to get rid of any excess traces of remaining adhesive.
-
Done
Once the wrap and any traces of adhesive are fully removed, use a cuticle oil to add moisture to your natural nail.


